2014-11-13

Petrel Mine

I am still thinking about selling the PY23, but not giving up sailing. When a deal fell into my lap for an old, but very usable 12 foot dinghy, I grabbed it. The boat in question is a Petrel, made of aluminum as commissioned by Alcan in the late 1960s. This particular one was probably made in the mid 1970s.

The boat blelonged to the Lewisporte Yacht Club, but had been neglected for years until I got it back into working order in 2013. You can read more about that at http://jph4.blogspot.ca/2014/04/alcan-petrel-12-sailing-dinghy.html.

My first sail aboard the Petrel in 2013. Note Serenity with the blue tarp up.

The Petrel will probably get a proper trailer, and mostly be used on fresh water from now on. My dinghy experience is very limited, so I'd rather spend some time on warmer waters until I'm more comfortable in one.

Lloyd sailing the Petrel in 2014.

The boat was used only a couple of times in 2014, even though it spent the summer in the water at the marina. Mostly I just bailed it out many, many times.

Bringing the Petrel home on 2014-11-09.

Even if Serenity finds a new owner, I'll have no trouble finding boats to crew aboard, and with the Petrel, I can still go sailing whenever I want. It is a whole lot cheaper to operate and maintain too.

The Petrel put away for the winter on 2014-11-13.

I'm looking forward to the spring already!

2014-10-12

The New Shed - Phase 5

With the ground prepared, and the removed sod in a big pile to maybe use later, it was time to start working on the form for the concrete. This is where positioning became much more important. The town wanted 3 feet of clearance on the side and 5 feet on the back.


From the CAD drawing of the property survey I was able to take measurements from various corners of existing buildings, like the house. Getting the intersections should be accurate within a couple inches. The often repaired fence around the property is not quite on the boundary line, so it was not something I could measure from.


Starting with the south end of the form frame, and allowing for thickness of materials, stakes were driven level into the ground. To them, was attached levelled 2x4 rails.


The next line of stakes went up along the eastern boundary, and thus allowed side clearance checks. The old 3-4-5 rule (and multiples thereof) came in handy with squaring things up.


Then came the western side. Along the way I had to buy a larger sledge hammer, and even then, each stake and support took about an hour to do. With the form coming together, the difference in grade between the SW corner and the NE corner became more obvious. It is around 18 inches, so I may have to do some digging in the back to help compensate, or a long ramp will be required until the driveway can be raised.


The front of the form (north side) was last, and not finished. While the levelness carried around, I wasn't quite sure about the square. Also, I wanted to leave a gap to get the stone and other materials in. The lower rails were attached, however, that was as much time as could be put into the project this year. It was time to start preparing for winter. (This is one of the projects that had to get done: http://py23serenity.blogspot.ca/2014/11/tongue-extension.html)


A lot of work has been done, so as soon as the snow is gone and the frost is out of the ground, the form can be finished, concrete poured, and the structure started. Watch for more phases in 2015.


The Entire Story To Date:

The New Shed - Phase 4
The New Shed - Phase 3
The New Shed - Phase 2
The New Shed - Phase 1

2014-09-15

The New Shed - Phase 4

Clearing away all the sod by hand took much longer than I expected. It was into September before that phase was completed. Around the sides it was a couple feet larger than the shed's footprint, but on the front I had to go all the way to the end of the asphalt driveway.


Then there was a stump and roots to deal with.


After digging away as much as I could, I blasted it with the garden hose to expose as much of the roots as possible. A chainsaw was used to cut away all the roots which could be accessed. A come-along was attached to the hitch of my truck, and cranked on to lift the stump so it could be cut at until it finally let go.


The ground was raked and cleared of any remaining organic material. Rocks and pebbles which surfaced were brought to the driveway side to be used as fill and drainage.


A check of where I needed the top of the shed/garage/workshop's floor to be showed that rather than digging down for my footing, it had to come up. Upon speaking with a supplier of stone, it was determined that it would take about one dump truck load of class A to provide the volume I needed under the concrete.


Spreading out the crushed stone took a while, even with some help from Jim and the purchase of a new rake and shovel.


The final levelling has to wait until after the form is built since the top of the class A has to be 9" below the top of the floor to allow for 4" of concrete, 2" of foam insulation, and 3" of stone.


I'm not an engineer, architect, or even a contractor, but I can do research, and I can make some pretty nice CAD drawings and do most of my own work. According to David Hewlett, that might make me a reno nerd.


The Entire Story To Date:

The New Shed - Phase 3
The New Shed - Phase 2
The New Shed - Phase 1

2014-09-11

Fuel for the Fire

There was a sale on recently at an marine store I order from online. My wishlist there is several pages long, and whenever they have specials, I go through it to see what I need now that I can save a few dollars on. Among the essential items this time was a Contoure Heatmate 5200 stove/heater.


I already have a single burner butane stove, and a propane barbecue on the boat, so I was more interested in the cabin warming abilities of this unit than its ability to boil water. We are into the cooler days for boating now, and any time on a mooring would be much more comfortable with some economical, safe and portable source of heat.

Another reason for buying a unit like this now, is for home. It is not unusual to lose the electricity during winter storms for hours, or even days. A little heater would be quite appreciated at such a time. It would keep us warm, and cook food.

The issue, I have discovered, is what to use as fuel for the thing. It runs on non-pressurized denatured alcohol, but try finding something labelled as "denatured alcohol" in a marine or hardware store in a small town in Newfoundland. Doing a search on the internet turns up results that show even people in larger centres are having trouble buying the proper fuel. See also http://blog.bigsnit.com/2010/05/01/finding-denatured-alcohol-in-canada/.

So, I researched exactly what denatured alcohol is, and it turns out that you actually have a couple of choices for fuel in a device like this, ethanol with additives to make it undrinkable (aka methylated spirits), or methyl hydrate (methanol). The former pumps out more heat per volume, but the latter is much less expensive, however, it is more toxic. You can find methyl hydrate with the paint thinners and brake cleaners.


For food safe, you'd probably think that you can't do any better than called Fondue Fuel. A closer look at the description reveals that it "is a highly refined Methyl Hydrate that provides excellent, odour free fuel for fondue heaters and chafing dishes." Ok, so maybe it isn't as bad as I thought, in this more refined state. You can pick it up at places like Rona, Walmart and Home Hardware for about $2.50/500ml or $20 for 4L. Do not buy the gel versions for wick cylinder burners!


For a source of ethanol (ethyl alcohol), the choices are not as many, and the price jumps up a bit. The most commonly available product appears to be BioFlame Fireplace fuel. It is about $25 and comes in 3.78L jugs at both Home Hardware and Canadian Tire.


At marine stores you may find denatured alcohol products, like Captan Phab Marine Alcohol for a little over $20. Stright-MacKay has a 4L jug of fuel for $35.25, if you are willing to spend the extra coin.


Your choices and experiences will probably be different than mine, so I'd be interested in hearing what you use in your non-pressurized, wick fuel canister heater/stove.


Here is a review of the 5200 by Practical Sailor: HeatMate Takes the Chill Off - Alcohol heater-stove is a simple onboard heating solution. And a YouTube rundown on operation.


2014-08-29

The New Shed - Phase 3

This part was what I expected to be the quickest and easiest, but it has turned out to be the longest and most difficult job so far - removing the grass. My plan was to rent a mini excavator for a day, scrape the organics away, and make the ground ready for the foundation.

August 12 - String run for a guide


So, I contacted the guy to get the machine, and he said that he might be able to do the job cheaper, since they are used to this type of work, and operating the machinery. He came by and looked it over, we discussed what he would do, and scheduled a day. A couple hours later I realized that I didn't get a price quote. The figure he gave me was double what I had budgeted, so it was back on me.

August 12 - Sods rolled and stored for future compost


Since the day off work I was going to use for this machine operation was now pretty much over, I was forced to manually strip the sods whenever I could find a few minutes to spare, when the weather was cooperating. Where July had been one of the hottest months on record, August was one of the wettest. We also had to be out of town a couple of times during the month.

August 16 - Weapons of grass destruction


After using some string to outline an area 2 feet larger than the footprint of the foundation, an edger was used to cut the grass into strips of about 1 foot wide. At first I rolled them up, but this was too dirty and strenuous a job, especially when the grass was damp, so I began cutting them into squares and carrying them to the pile.

August 16 - Making progress

My wife took over most of the cutting duties, but I still have to pry the sods up,  relocate them, and rake the ground. My right hip started to give out on me, so I'm now working with my left side. Many times I've wished that I'd come up with the money to have a machine do all this, but the end is near.

August 16 - Only a few more feet to go.


Next up I have to do some level work to determine my top of grade, and then dig out for the footing. After that it is crushed stone, insulation, etc and the form. That is, if this old body holds together long enough.


The Entire Story To Date:

The New Shed - Phase 2
The New Shed - Phase 1

2014-08-26

Game Over Ingress

Ingress is an augmented realty game which uses a smart phone's GPSr to turn certain locations into things called "Portals ". A person has to physically go to a portal to participate. Once there, you can hack, capture, attack or link, depending on your intentions and which faction controls the portal.

While it was still in beta, back in 2012, I requested an invite, and received one that December. I downloaded the app, and completed training, but there were no portals around here to interact with, so I would have to submit some.

 
Being winter, I decided to wait until the weather warmed up and the snow melted before taking the required photos of potential portal locations. After waiting a couple more months, one was activated, and I was able to capture it for the Enlightened faction, and do some hacking for inventory items.

After a while the second one was available, but it wasn't much fun playing alone, so I didn't do much with the game. Then, about a year later, I got notice that someone from the Resistance had taken over my poorly defended portals. This got me back playing more regularly, but there wasn't much I could do against them at my low level.

One day this summer I heard that a much higher level player from my team would be in town, and planned on retaking one of the portals. We met at the location, and I had my first encounter with others who were playing the game too. I got more involved with the community, and started introducing family and friends to it. The game was beginning to get fun and interesting.

Then, a couple days ago, I got an email from the people who operate the game, accusing me of cheating. They would not say what I had done wrong, and provided no means of defending myself, just an order to stop whatever it was I was doing, or have my account disabled.

So, here I am at Level 3 of 16, having played the game for about 20 months, when other people can get beyond Level 5 in a week, and I'm accused of cheating and generally being a despicable person who is taking all the fun out of the game for others. If I was cheating, then I was doing a very poor job of it, considering how slowly I have been advancing.

Since I know that I am not running any helper apps, or anything out of the ordinary, there is nothing I can stop doing. My conclusion was, that to keep from being kicked out of the game, I had to stop playing the game. With that decision made, I deleted the app from my phone, and severed all connections to the community.

It is only a game. I will not put up with being accused of wrongdoing and having my character attacked for a mere casual pastime. It is especially unacceptable since there is no crime specified, and there is no means of proving your innocence. I was assumed guilty and sternly warned.

Ingress, as far as I am concerned, it is game over.

2014-08-07

The New Shed - Phase 2


Spring in Newfoundland can be rather cool and wet. First the ground was soggy from all the melting snow, and then all the rain. By the end of June 2014, however, the weather changed, and we entered an unusually long stretch of hot, dry weather. This allowed the back lawn to dry out, and firm up enough to try moving the metal shed.


The first job was to move the fabric shed. It had to be shifted closer to the house to make some space. After that, I gathered up 8 junks of wood of approximately the same diameter to use as rollers, some blocks for a fulcrum, and a 2"x6"x4' board for a lever.

The shed up on rollers and rotated. July 12, 2014


Using the lever I was able to lift the now empty shed up off the corner blocks, and place the rollers under it on two sides. Then, using the lever, I rotated the shed 90 degrees, and pushed it. The effort required was easier than I expected as we moved it from the back corner of the lawn to the back of the driveway next to the other shed. The corner blocks were put back under, and the shed reloaded.

The lever and I put that shed in its place.

Then my sister and niece came to visit for a couple of weeks, and no more work was done. After they returned home to Ontario, I worked out what the GPS coordinates for the new shed corners were, and invited my boss to give me a hand staking them out. They checked within tolerance for size and square. I was ready for the town inspection.

The corner stakes as of August 7.


My wife called down, and discovered that not all my documents were on file, and that the preliminary building permit had expired after a year. We had to redo everything and pretty much start from scratch with the town.

When the inspector dropped by, and looked things over. He said that the floor area was acceptable, but that new regulations stated that the height could not be over 4m (13') now. That would flatten my roof, and make the upstairs storage area pretty much impossible.

After chatting some more, and looking around, he noted that there were no houses back there, only a couple neighbour sheds which were barn style, and quite a bit larger than the one I had planned. It might be possible to get around the height restriction in this case. He would get back to me.

2 neighbours barn-style sheds, and my 3 old ones.

A couple days later we got the call to come get the building permit. The height as submitted would be allowed, on stipulation that the shed was shifted half a meter toward the street. I didn't have a problem with that, and immediately went down and paid my $25. Now the real work can begin.


The Entire Story To Date:

The New Shed - Phase 1

The New Shed - Phase 1

There are three small sheds in my backyard. The 8' x 16' wooden one I helped build with my father in my teens, about 35 years ago. This shed has a workbench, and most of my tools. It is my workshop, and a storage place for good bits of wood and parts.

A change in the environment has seen a good part of the backyard become very soggy for much of the summer, and so the floor of this shed has rotted out. It has been repaired, but the rot has spread to the point where I don't expect the structure to last much longer. I can't even use it during the winter, because freezing and thawing of snow causes the door to be iced shut until spring.

The old shed in February 2014

The second shed is an 10' x 8' metal one, that we put up about 20 years ago to supplement the wooden one. It held things like bicycles, lawnmower, kid's outdoor toys, and so on. It was assembled on a wooden base that has started to succumb to the same rot issues, and the metal is breaking and bending. Another winter with lots of snow, or a few more storms with the wind stressing it, and it is going to disintegrate.

The third shed is one of those 8' x 10' yellow fabric on metal poles things from Canadian Tire. It was bought as a place to put my motorcycle out of the weather, when I got into that about 4 years ago. These things are not made to last, especially in the conditions we experience. I have to tie it to concrete blocks, and the truck, when the winds really pick up. They are known to turn into stringless kites. Remember the melt water? My motorcycle was also locked into place until spring.

Motorcycle slowly being released from the ice in April 2014.

So, here I am with 3 sheds that are on the verge of falling apart at about the same time, and they need to be replaced ASAP. The idea of building a large shed/garage/workshop has been tossing around in my head for about 10 years, but it is a scary, and expensive undertaking. I started taking talking to people about their sheds, and the common theme was, "you can't build a shed too big". Everyone wished they had gone larger.


February 2014 snow around the 2 small sheds.


In the spring of 2013 I got a copy of the town's regulations for accessory buildings, and did the calculations to determine that I would be able to construct a building of a maximum size of 20' x 28, by 17' high. It would have a concrete foundation to avoid future problems with rotten wood, and a narrow attic space for storage. In the main area there would be a small room I could heat to store all my computer gear and have a place to work all year.

My job is in land surveying, so I'm familiar with CAD programs in general, but not designing buildings specifically. Looking around the internet, I found a free 2D CAD program called LibreCAD that I could use to get the ideas from my head to paper. With my background, it wasn't too difficult to figure out, and I eventually had something I could print out. Then I made up a plot plan to show the town where the new building would be located.

My plans for the new shed/garage/workshop.

Contacting the town again with my plans, I was informed that I needed to stake out the area where the new shed would be located, and someone would come by to look it over. Well, the metal shed was occupying one corner of that space, and I would need it to continue holding stuff until the new one was finished. It had to be relocated before staking.

By now, being busy at work and life in general, it was getting late in the year, and thoughts of construction were postponed until 2014. At least the ball was rolling.

2014-05-24

Bye-Bye B4000

Before getting to work on my sailboat, Serenity, this spring, I had several other projects to complete. Yesterday I got one out of the way, literally. My dead and decaying 1997 Mazda B4000 got hauled off to the scrap yard.


Before owning a truck, I had a 1995 Elantra station wagon which I treated like a truck. The back seat was folded down and covered with a tarp, so that I could toss parts, machinery, building materials, dog, camping gear, or whatever back there. It had a hitch, which was called in to do some towing quite often, and a rack on the roof for my sea kayak. Then we got the sailboat and I had to borrow a truck to haul that around. Once we bought a travel trailer, a truck of our own was a necessity. The Elantra was given to my daughter, who used it for a couple of years while in school.


I saw the B4000 on a dealer's lot and it was just what I needed. It was getting on in years, but it was what I could afford, and the with 4L V6, it could handle the towing requirements. It hauled my sailboat to and from the marina, and pulled the travel trailer between campgrounds for holidays. With a cap on the pan, it kept things there clean and dry, and the rack on top was great for the canoe.


Then, a few years ago my wife came home from work with the truck running rough, and white smoke billowing from the exhaust pipe. The diagnosis was a blown cylinder head gasket. Estimate to repair it was $1500, about the value of the truck. If I had a garage to put it in, I would have attempted the rebuild myself, but it was not a job to do in the driveway. The truck sat parked for months while we tried to figure out what to do with it.

Then an opportunity came to purchase a 2000 Toyota 4Runner in early 2012, so I put the B4000 up for sale. It had lots of new parts, but offers did not cover what I could get for the cap, or new tires alone, and I still thought I might get a chance to fix it myself, so it sat a bit longer.

Things did not go well with the 4Runner. We only had it for a couple of months before it was written off in an accident. I was back to borrowing a truck for launching the sailboat, and the travel trailer was put up for sale.

Then in the spring of 2013, on the same dealer's lot, there sat a 2004 Chevrolet Avalanche 1500 Z71. After some negotiation, I bought it at a very good price. So, as I got time over the next year, I took parts off the B4000 to sell. This spring there was nothing of value left but the tires, so the new truck brought the old truck to the local scrap yard, where I was allows to remove the wheels, and they gave me what I had been offered years earlier for the full truck, $100.


It was a sad day. Someone with time and interest could have rebuilt the little Mazda and gotten a few more years out of it. Unfortunately, it was not me. At least I have a big part of my driveway back, and one less project on the to-do list.

2014-04-19

Get Your Motor Runnin'

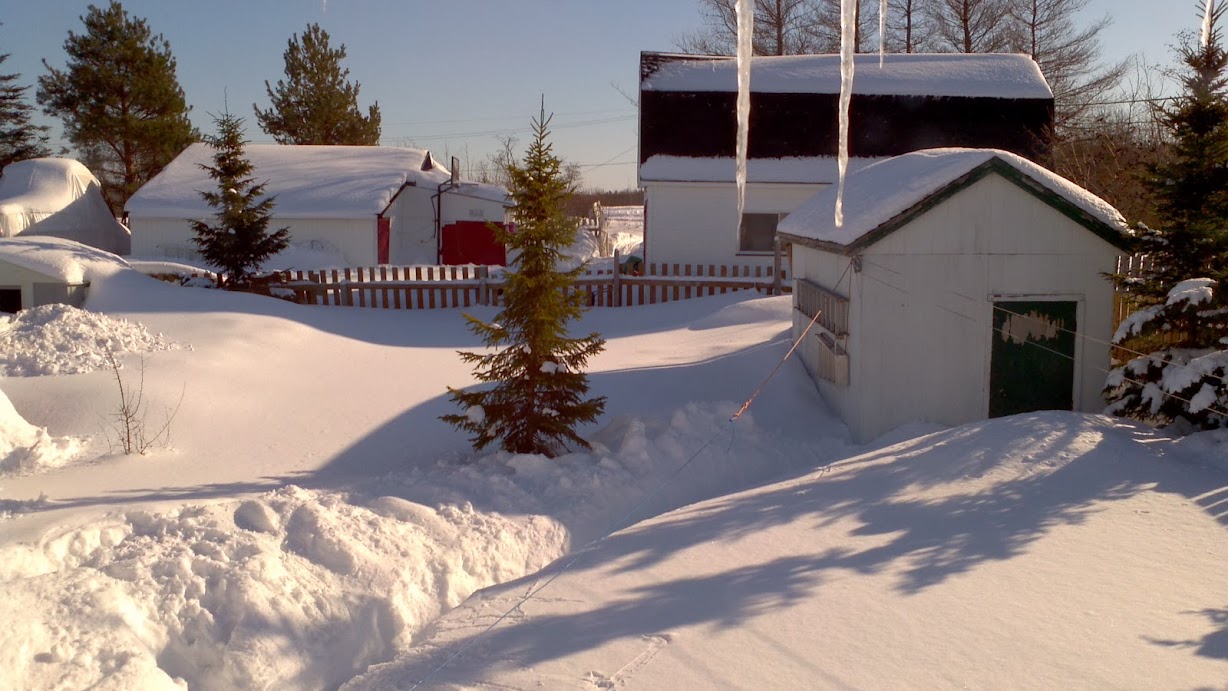
In 2012 I was able to go for my first motorcycle ride of the year on April 10. For 2013 it happened on March 14. On March 8, 2014, however, the motorcycle was locked in snow and ice inside the bike shed. The waters from a January thaw had accumulated inside the structure, and a couple inches of ice formed when the temperatures dropped again. I wasn't going to break any early season riding records this year.

March 8, 2014

By April 4 the temperatures were improving, and there were signs of melting some days inside the bike shed. There was still a lot of ice in there, and a lot of snow packed around the building, so I started clearing that away. My bicycle was able to be pulled free.

April 4, 2014

On April 16 enough of the ice had melted to pull the cover away from the motorcycle, and roll it outside. It needed the seats reattached, tire pressures checked, and the oil changed before and serious riding could be done, but it was now mobile.

April 16, 2014

There were also many things still encased in ice inside the shed, so there was work to do in there. The best I could do was give the bike a quick wash, before putting it away again.

April 16, 2014

Good Friday, April 18, was not the warmest of days, at less than 10ÂșC, but pleasant enough for working outside. I decided it was a good time to change the oil. The bike was moved outside to a location mostly out of the breeze, and in the sun. Going through my inventory in the shed, I found the 4L of motorcycle oil and the filter. These items were purchased while on sale last summer and set aside until they are needed.

The filter box was damp, but so was most everything else stored there. Upon removing it, however, I discovered that it must have been under water at some point, as there was definitely a sloshing liquid sound coming from inside it. I decided that it was not a good idea to use it, so the oil change would have to wait until I could pick up another one.

The tires still needed air. I could have gotten out a pump or compressor and done that at home, but it was too nice a day. A gasbar just up the road was where I often went to top up tires, and it was an excuse for a ride.

The first time driving the bike after a few months away from it, I like to do on the streets close to home. This is a safe way to practice changing gears, signalling, braking counter-steering, and so on. I also wanted to go by my buddy Peter's house to see if his bike was in the driveway, it wasn't.

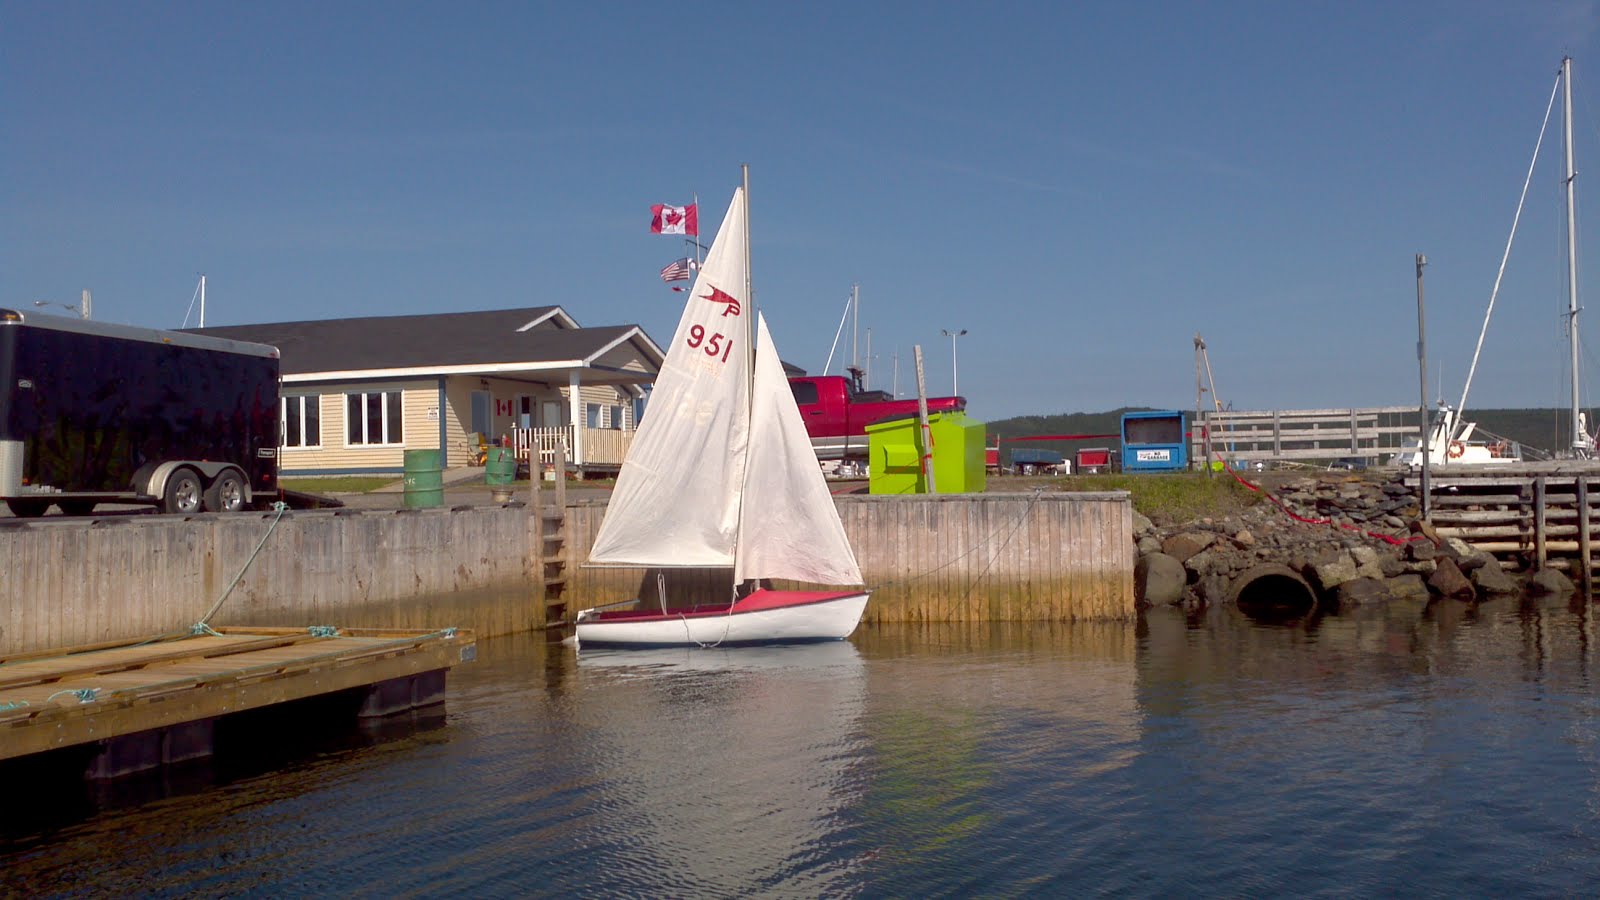
Arriving back home, I made sure I had a tire gauge, before venturing off on Main Street. The gasbar was on my left, so I went up as far as the mall at the south end of town to turn around. After topping up the tires, I turned right, and made my way to the marina to see how the expansion was coming along. The lot was rough and muddy, so I didn't explore very much. Turning right again I toured some streets on the north end of town.

Back on Main Street again, I stopped for a few minutes to visit my friend Byron. He doesn't have his motorcycle on the road yet, but is getting anxious to be riding again too. From there I went along a few more side streets and eventually back home again. Getting that air took over an hour, and I didn't see any other motorcycles on the road. Practising "the wave" will have to be done another time.

I should have taken a picture to commerate the first ride of the year, but since I didn't, you'll have to settle for this blog post about it, and remember that it took place on April 18, 2014.

2014-04-16

Alcan Petrel 951 Sailing Dinghy

The Lewisporte Yacht Club is in possession of 3 boats from the now defunct junior sailing program. These boats have been in storage for a few years, and in 2013 it was decided by the club's executive to make them ready to sail again. As a member of the LYC executive, this became primarily my job.
Brochure Photo

One of the boats is an inflatable dinghy which was used by the instructor to follow the kids, and tow the sailboats in and out of the marina. That one I did not have time to look at. The smallest training boat is an Optimist. They are very common and popular for introducing young children to sailing. Being too small for me, this one also did not receive much attention. The third boat, and the one that took up most of my time, was so unique, that I had to do some research on it. Information was scarce, so that is one of the reasons for this blog post.

It is a metal sailboat designed for The Aluminum Company of Canada, also known as Alcan, in 1966. Apparently, they commissioned a lot of boats in the 1960s and 1970s, and this model is called Petrel, of which over 1400 (2000?) were built. In the U.S., they can be found under the name AeroCraft, a company in Michigan. The club has boat #951.

Designed by Phillip Rhodes (#794), it is roughly 12' long and 5' wide, with a 20' mast and 100 square feet of sail. The sails measured as follows - Jib: Luff 138", Leech 145.5", Foot 85" - Main: Luff 185", Leech 202", Foot 85".

The planing hull, mast, boom, rudder and centerboard are made of aluminum. Cavities are foam filled, so the boat is unsinkable, and will not turn turtle if capsized. Weight is about 225 lbs.

The Petrel on its sledge.
This particular boat had been modified at some point. The main sheet attached to an eye on the centerboard trunk instead of a stern traveller, and the jib sheet cleats were turned around so that they would not hold the line. This made sailing solo difficult, so I put them back the way they should be.

The forestay was attached with an old piece of string, so I replaced that with a small turnbuckle. The jib tack was also attached with string, and that was replaced with a shackle. The halyards were in reasonable shape, but I replaced the one for the main sail anyway, and used that as a spring line when docked.

A set of oars were donated to row the boat when winds were not favourable, but I didn't have time to come up with a reasonable way to mount the horns. I'm now thinking that perhaps they would be better used for sculling the two dinghies.

Not being all that experienced with dinghies, I only took it out on days with light winds of under 10 knots. Once I had the jib cleats corrected, I could use both sails, and the dinghy moved along quite nicely. Getting in and out of the marina was always a challenge, however, and I learned not to try that with both sails up.

The Petrel is in pretty good shape now, and can be used with very little more work from now on. It could use a cockpit cover of some sort. A lot of time was spent bailing it out after each and every rainfall. Eventually, I'll have to take it to a pond or lake for capsize practice. Too much chance of hypothermia doing that in the harbour.

CameraZOOM-20130710164437139.jpg
A look at the sails after launching.


2013-08-05_TackingOut.jpg
Tacking out of the marina on August 5, 2013 for a test sail.


                                   Petrel photos gathered off the internet.                                   

Petrel Photo Album